
I’m leaving out the superlatives here because it is already a bit much :). Read on for perhaps one of the most involved recipes I have on hand. Delicious, but its a process.
I will eulogize Sourdough in another article. Safe to say, we got into sourdough a bit before the pandemic, but I know there has been an explosion of interest (and a precipitous decline once people get annoyed with it). We have stuck with it because we love the flavor. Especially in sweet treats like sticky buns, without a balancing flavor, like the Cantonese concepts of balancing sweet and sour, the food becomes way too much. With the sourdough “tang”, these are much more consumable and make a great freeze worthy treat.
The Tangzhong is another recent trend following on from that famous King Arthur flour article/recipe. Once Bon Apetit and Tasty and all the other food blogs get on the bandwagon, you know its hit its peak trendiness. That however is by the by. I do follow the tangzhong method here, it is supposed to result in a more moist bread when you reheat it later. I will say this recipe yields a very moist sticky bun, but I’m not really sure if it is because of the Tangzhong. Frankly it works, and it is quite the process, so I’m not about to try a comparo. Feel free to do an experiment if you are feeling masochistic enough.
As for the process, yes, I know, it is a bit much. But the best things in life take time. Like Babies. They take a lot of time. And they bite. At least my sticky buns don’t bite. Count your blessings.
Recipe :
Batter Recipe
Sourdough Starter* 113.5g
Lukewarm Milk 20g (totals 85g w/ tangzhong)
1 Room Temperature Egg**
2 Tbsp Softened Butter
AP flour 150g (totals 163g w/ tangzhong)
Whole Wheat flour 28.5g
Granulated Sugar 25g
Salt 3/4 tsp
Tangzhong*** = Measure out 13g AP + 65g milk (in a microwave safe bowl)
Filling recipe
Butter (2-3 tablespoons)
Dark Brown Sugar 62g
Cinnamon powder 2g
Pinch of ground nutmeg
Glaze recipe
Butter (4 tablespoons)
Dark Brown Sugar 57g
Maple Syrup (1.5 tablespoons)
Pecans (3/4 cup or to as desired)
* sourdough starter is calculated as 50% flour and 50% water and must have been fed within the last 8-12 hours so that it is at the peak of its activity.
** if doubling the recipe, keep the egg to 1 egg. When halving a recipe, there is no point in reducing a single egg, the total effect of hydration of half an egg vs one egg is negligible
** tangzhong is a roux of flour and water. this is an asian technique to boost the hydration level while keeping the stickiness of the dough to a manageable level. For this first recipe, I’ve not increased the hydration too much, currently it is 73%, but it could be increased.
Method :
Prep :
1. First (assuming you just took your egg out of the fridge :), stick your egg in cup of warm (not hot!) water to allow it to get to room temp before incorporating into the recipe.
2. Next, prepare the tangzhong :
– Mix a watery roux of the separated flour and liquid (in this case the AP flour and milk).
– Then microwave the mixture (or you can cook this on the stove but why take the extra step, it doesnt add any flavor to the tangzhong), first for 20 seconds and then in increments of 10 seconds till you get a thick roux, which should be very gelatinous, about the consistency of pudding.
3. Soften the butter in the microwave, stopping before it liquifies or melts and loses its structure.
Prepare the batter:
4. Get the bowl of the stand mixer on a scale, and tare it. This will allow you to add all the ingredients by weight without messing up 13 measuring devices 🙂 – for easy cleanup!
5. Measure in the ingredients (except salt) by weight (starting with the dry and then the wet ingredients) and tare the scale in between to reset to 0g. This includes AP flour, whole wheat flour, and sugar (dry ingredients). Then add the sourdough starter, milk, egg, butter and finally the tangzhong mixture.
6. Measure the salt out in a small container separately (remember to tare the scale with the empty container 🙂
7. Set the bowl in the stand mixer and start mixing at setting 1 for 2-3 minutes.
8. Add the salt on top of the dough, cover with a cloth and let it rest for 20 minutes (this period is called the autolyse, which allows the flour and liquid to incorporate).
9. At the end of this period, start the mixer again on setting 1 for a minute and then increase the speed by one or two settings, for an additional 2-3 minutes. It should still be slightly sticky at this point.
10. Take the bowl out of the mixer (if you would like, as I did, use a dough scraper to scrape it off the sides and bottom of the bowl and do a stretch and fold of the dough in the bowl) and cover with cling film and leave on the counter overnight (between 6-8 hrs) until doubled in size.
Next morning
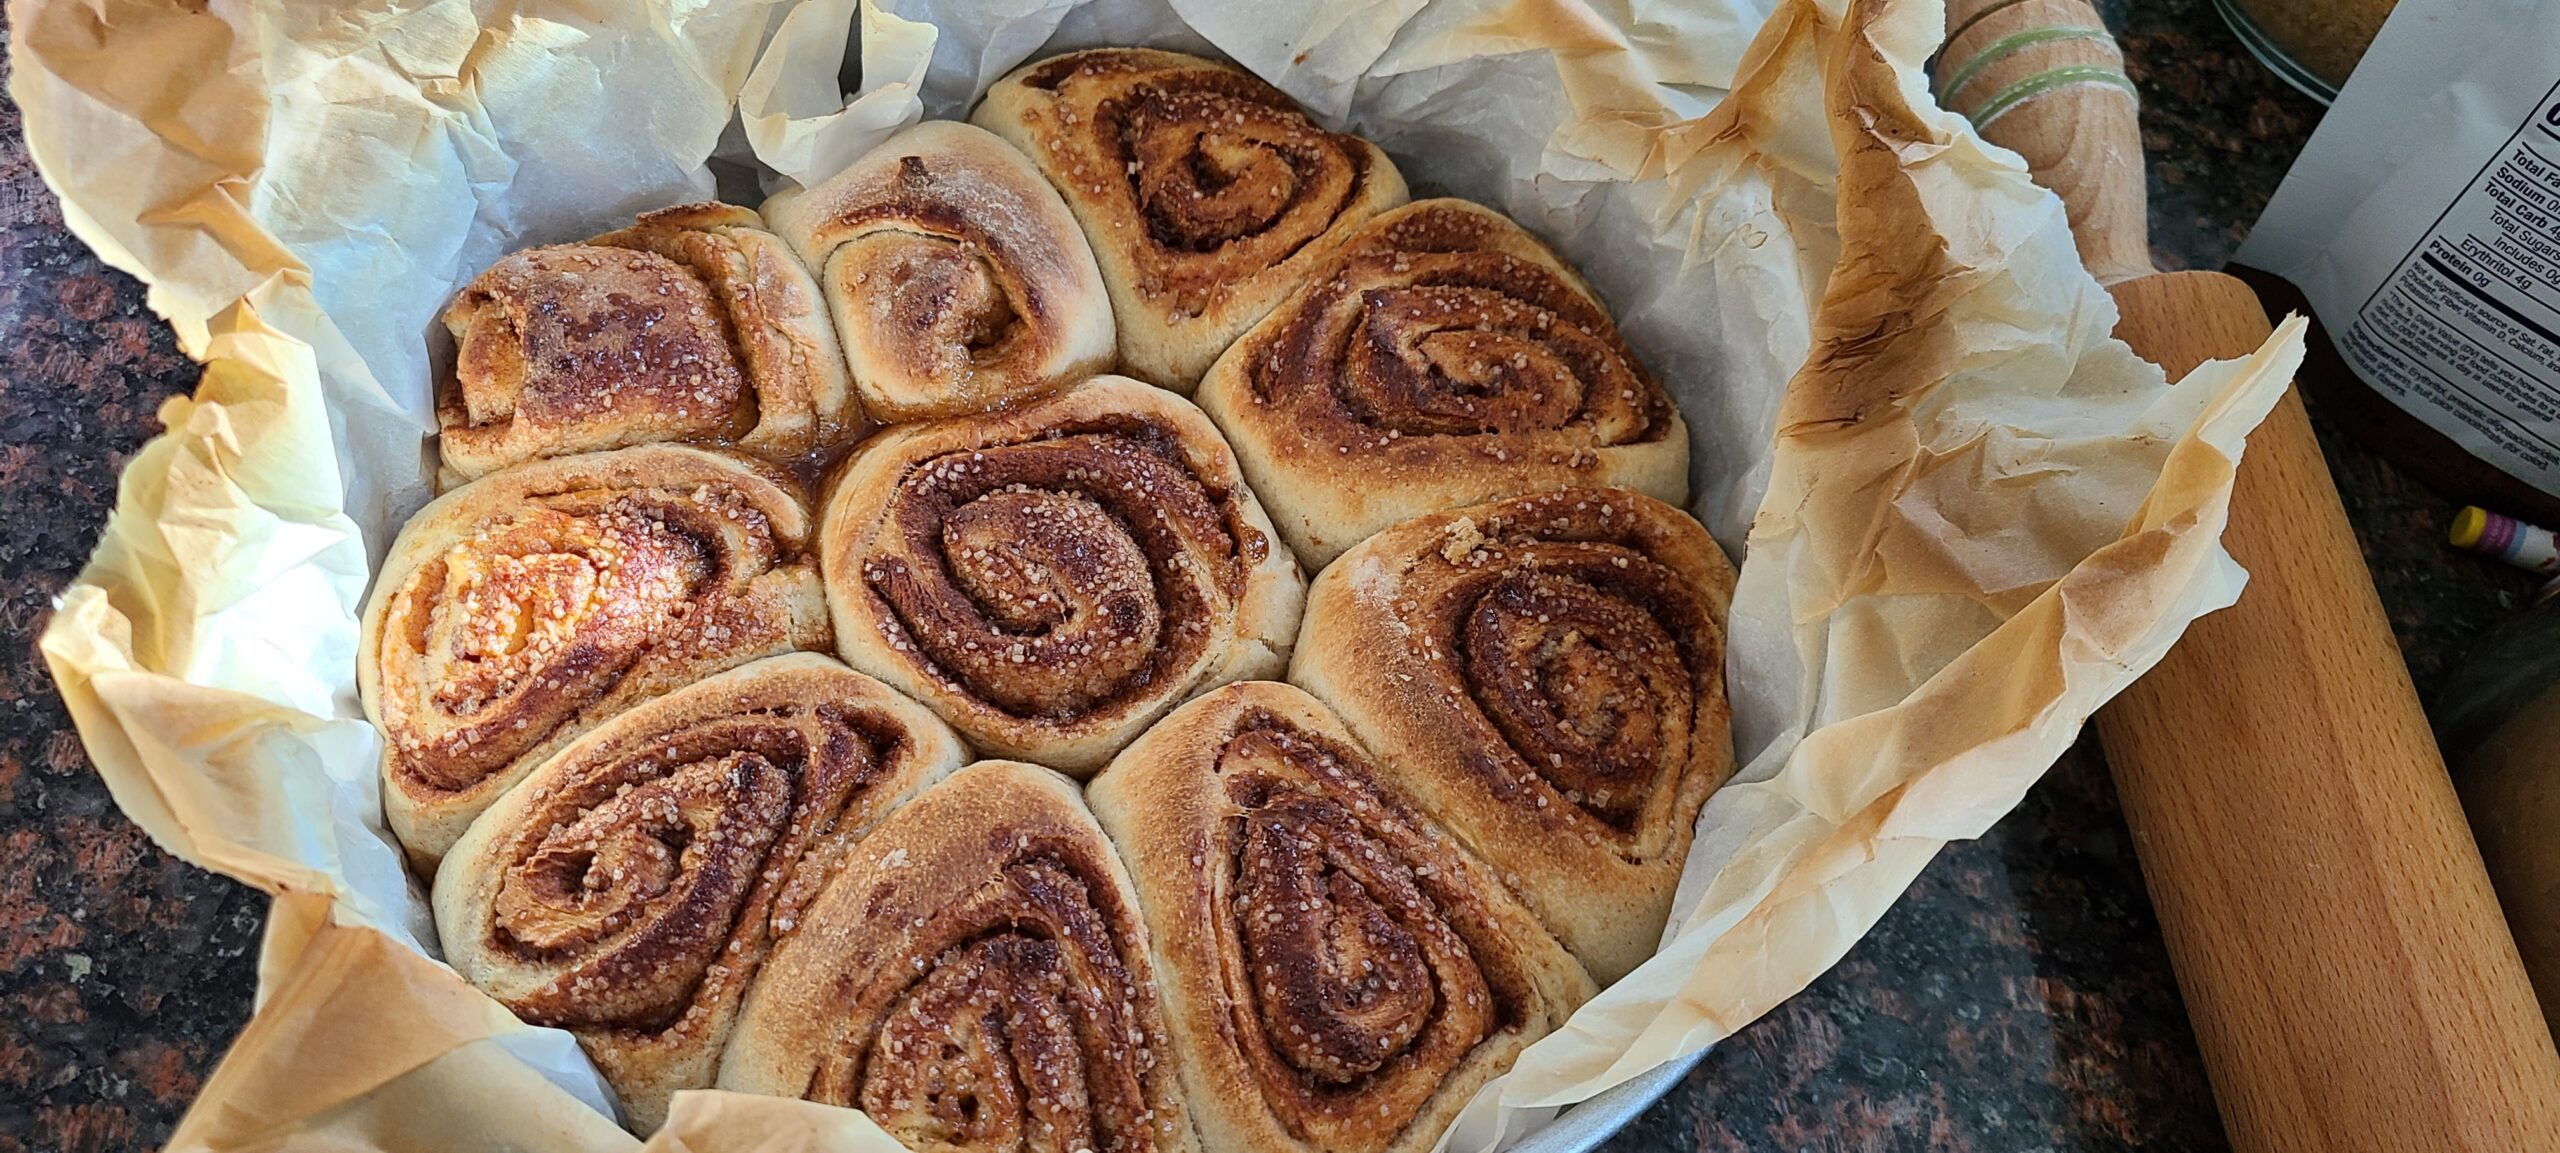
11. First check on your dough to ensure it has risen overnight, which should have happened assuming your starter was active and fed (aka ripe).
12. Roll your dough out on to a floured counter (you may need to use a dough scraper to get it out of the bowl. Then roll into a ball with floured hands and “stretch and fold” the dough back in. This is a fancy way of saying fold the dough over on itself from four “corners” till you have a small knot of dough which you can pinch together like a dumpling top. Dust with flour again and cover with a cloth to rest for nearly an hour while you get to the rest of the below steps :).
13. Now prepare the pecans, glaze and the filling.
14. First, smash the pecans to desired size in a pestle or any other method. Work out your frustration of how long this is taking.
15. Next, toast the pecans on a pan until fragrant (or “smelly”, depending on if you like pecans).
16. Add the rest of the glaze recipe to a non stick pan and heat over medium/medium low heat till it all incorporates together.
17. Now pour this out into a small pan or 8in cast iron pan. (I made the mistake of using a larger cast iron resulting in very spread out, albiet very tasty rolls).
18. Top the glaze mixture evenly with the toasted pecans
19. Prepare the filling, (except the butter), mixing the dry ingredients with a fork.
20. Hopefully that above activities took you most of an hour. if not, make yourself a coffee and hang out and consider just how long this is all taking and ponder if it will be worth it (spoiler alert : it is!).
The Final Countdown!
21. Preheat your oven to 350F
22. Prep your counter with a bit more flour, and roll or pat the dough (I prefer patting out the dough because the rolling pin compacts the dough, but you’re probably getting tired of all this by now) out into a roughly squareish shape. Get the thickness down to a couple of quarters stacked together (yes, thats pretty arbitrary).
23. Now melt the butter for the filling in the microwave in a small dish and brush the butter over the flattened dough.
24. Spread the dry filling evenly over the sheet of dough leaving a “lip” (say about 1/2 inch) of uncovered dough on the longest side to “seal” the roll and prevent the buggers from busting open.
25. Starting with the longer side (and opposite to the lip you left uncovered), roll the dough over (using a dough scraper if needed to release it from the counter) until you have a nice log of rolled dough. pinch the lip to seal it to the body of the “log”. This will prevent the rolls from bursting open.
26. Cut the dough with a sharp serrated knife about the height of your cast iron pan (sharp serrated knife, so you don’t squish the rolls). Apparently you can use dental floss, but doesnt that make your rolls taste minty? If you’d like, you can roll that dice and let me know how it tastes :). You should have between 5-6 of the rolls at this point.
27. Next, arrange the dough in the baking pan or cast iron pan that you have prepared with the filling and the pecans.
28. You’re almost done! Stick the rolls in the oven and set the timer for 20 minutes.
29. Make sure the tops are nice and toasty brown. Then (please use mittens, or you’ll burn your actual mittens), flip the whole kit and kaboodle onto a cutting board, serving tray or leftover christmas wrapping paper (ok, that last one was a joke).
30. Enjoy the fruits of your.. extreme labor and 12+ hours of preparation.
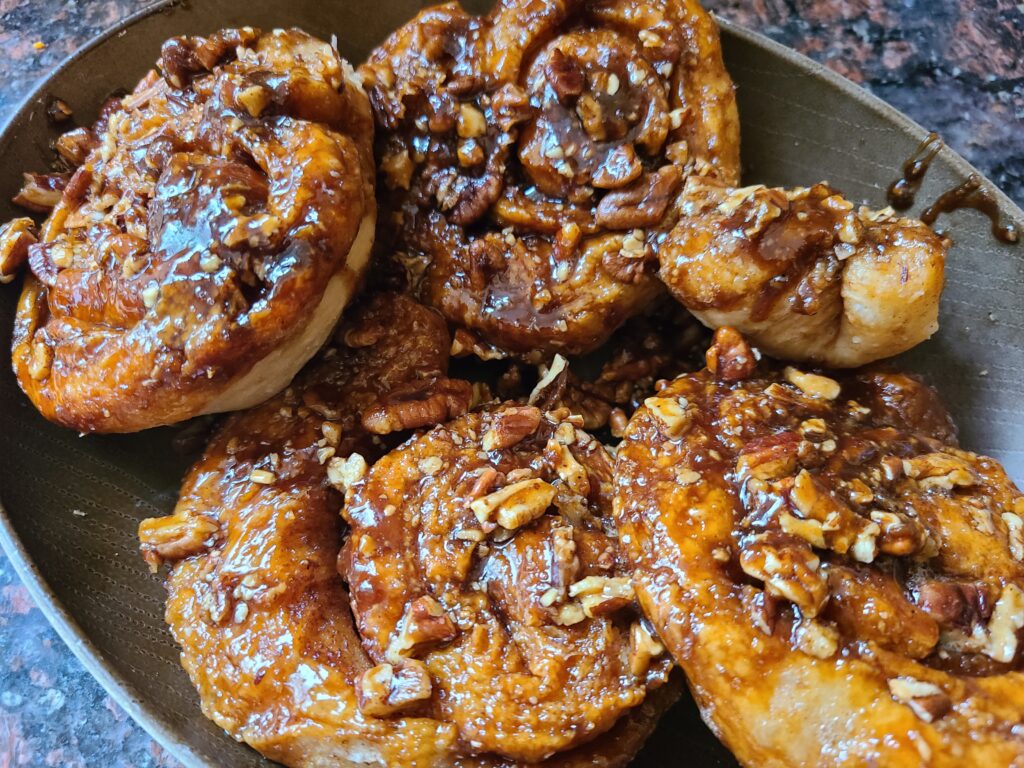
Was it worth it? It was for me! The very slight tang of sourdough balanced the sweetness of this recipe, and the pecans were amazingly candied. I would probably reduce the sugar and butter going forward. The tangzhong ensured that the rolls will survive longer in your fridge, so next time, I’ll probably make the full recipe (double of the above). The first time I make any recipe, I make a little bit to test it out and reduce waste. When I really want to experiment, I think upping the hydration to 80% would also be interesting to try.
Happy Cooking and Happy Eating!
Notes (for me to geek out on) :
– Autolyse – allowing the dough to rest after the first mix to allow for the flour to hydrate
– Salt – add the salt at the end on top of the flour, before the autolyse and dont mix it in
– Tangzhong takes 5-10% of the flour and a ratio of 1:5 to create the slurry
– Sourdough starter is 50/50ish flour and water
– hydration takes into account all the liquids inclusive of butter or other fats, portions of eggs and honey/maple syrup (small amounts wont significantly change hydration, only worry about this for fat/egg heavy recipes like brioche)
– Milk: 87% water
– Large eggs: 74% water (1 large shelled egg weighs 50g)
– Liquid sweeteners (e.g., honey): 17% water
– American-style butter: 16% water
– Vegetable oil: 0% water (100% fat)
- Hydration Math
- dry ingredients = (113.5/2)+163+28.5+25=273.25
- wet ingredients = 85+28.5+30+(113.5/2)=200.25
- hydration % = 73.3%
P.s. My auto analyzer tells me this recipe is unreadable. Ha! Thanks for stating the obvious, mr robot.